Is your trusty iPad 7th Gen acting up? Whether it's a frozen screen, a stubborn Wi-Fi connection, or a battery that drains faster than you can say "charge me," encountering technical hiccups can be incredibly frustrating. This comprehensive guide on Troubleshooting & Support for iPad 7th Gen is your go-to resource, designed to help you diagnose and fix common problems without needing a tech wizard on speed dial. We'll walk through practical, step-by-step solutions, empowering you to get your iPad back to its smooth, reliable self.
At a Glance: Quick Fixes for Common iPad 7th Gen Issues
- Frozen/Unresponsive? Try a Force Restart: Press and hold the Top button and either Volume button until you see the Apple logo.
- Black Screen? Ensure it's charged for at least an hour, then force restart.
- Apps Crashing? Update iOS and apps, or offload/delete problematic apps.
- Wi-Fi Not Connecting? Toggle Wi-Fi off/on, restart router, or reset network settings.
- Charging Slowly? Check your cable and adapter for damage, try a different outlet.
- Stuck on Apple Logo? Connect to a computer and use iTunes/Finder to update or restore.
- Still Baffled? Back up your data and consider a full restore, or contact Apple Support.
Decoding Your iPad's S.O.S.: The Foundation of Troubleshooting
When your iPad 7th Gen hits a snag, it's easy to jump straight to panic. But most issues have straightforward solutions. Think of troubleshooting as a detective process: start with the obvious, then move to more complex investigations. The vast majority of problems, from minor app glitches to a completely frozen screen, can often be resolved by these foundational steps.
The Universal Reset: Soft Restart
Before diving into anything drastic, give your iPad a simple soft restart. This closes all open apps, clears temporary caches, and can resolve minor software conflicts without losing any data. It’s like a fresh cup of coffee for your device.
How to do it:
- Press and hold the Top button until the "slide to power off" slider appears.
- Drag the slider to turn off your iPad.
- Wait about 30 seconds.
- Press and hold the Top button again until you see the Apple logo.
This quick action often clears up minor bugs, unresponsive apps, or general sluggishness.
When Soft Isn't Enough: Force Restart (Hard Reset)
If your iPad is completely frozen, unresponsive to touches, or stuck on a screen, a force restart is your next best bet. This action doesn't erase any data, but it forces the iPad to power down and reboot, bypassing any software hang-ups.
How to do it:
- Press and hold the Top button and either Volume button simultaneously.
- Keep holding them down. Don't release when the "slide to power off" appears.
- Continue holding until you see the Apple logo. This usually takes about 10-15 seconds.
- Once the Apple logo appears, release both buttons and let your iPad start up normally.
A force restart is your first line of defense against many frustrating freezes, as noted by resources like iFixit, which often recommend it for unresponsive devices.
When Your Screen Stays Silent: Display Issues
Nothing is more alarming than an iPad that seems utterly lifeless. Whether it's a completely black screen or a display that's barely visible, these issues often have straightforward (and thankfully, non-hardware) causes.
The Dreaded Black Screen or No Display
Your iPad might appear dead, showing nothing but a dark void. This is a common concern, but often easily fixable.
Troubleshooting Steps:
- Charge It Up: The most common culprit for a black screen is a completely depleted battery. Connect your iPad to a known working charger and wall outlet. Let it charge for at least an hour. Even if you don't see anything on the screen immediately, the battery might be too low to even display the charging indicator.
- Force Restart: While still connected to power, perform a force restart (hold the Top button and either Volume button until the Apple logo appears). This can wake up a deeply discharged iPad.
- Check for Physical Damage: Inspect the screen for any visible cracks or impact damage. If the screen is physically broken, you might need professional iPad screen repair.
- Connect to a Computer: Plug your iPad into a computer with iTunes (Windows or macOS Mojave and earlier) or Finder (macOS Catalina and later). If your computer recognizes the iPad, even if the screen is black, it indicates the device is still functional and the issue might be with the display itself or a software glitch preventing it from turning on. You might then be prompted to update or restore.
Dim Screen or Flickering Display
If your screen is on but looks unusually dim, or if it's flickering erratically, a few settings or environmental factors could be at play.
Troubleshooting Steps:
- Adjust Brightness: Swipe down from the top-right corner to open Control Center. Drag the brightness slider to increase the screen's luminance. Also, check if "Auto-Brightness" is enabled in
Settings > Accessibility > Display & Text Size. Sometimes, ambient light sensors can mistakenly dim the screen in brightly lit environments. - Disable True Tone/Night Shift: These features adjust screen color and brightness based on your environment or time of day. Try disabling them in
Settings > Display & Brightnessto see if the flickering stops. - Restart iPad: A simple restart can often resolve minor display glitches.
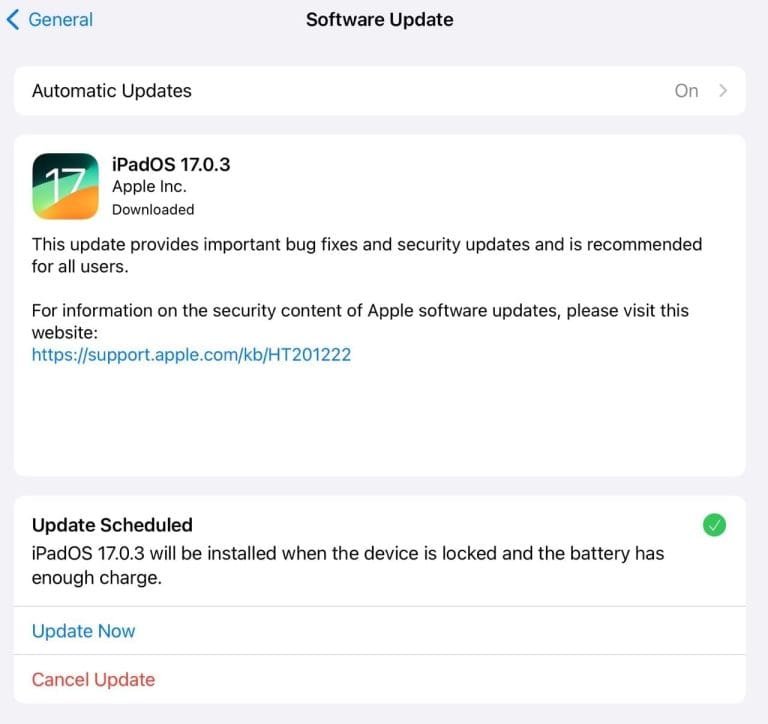
- Software Update: Ensure your iPad is running the latest version of iPadOS. Go to
Settings > General > Software Update. A software bug could be causing the issue.
The Apple Logo Loop & Frozen Screens: Boot Issues
When your iPad gets stuck in a loop, showing the Apple logo repeatedly, or simply freezes during startup, it's usually a software issue. These problems can occur during or after an iOS update, or seemingly out of the blue.
Stuck on Apple Logo
This common problem means your iPad isn't completing its boot sequence. It might show the Apple logo, then go black, then show the logo again.
Troubleshooting Steps:
- Force Restart: Your first attempt should always be a force restart (hold Top + Volume buttons). This often jolts the system out of the loop.
- Connect to iTunes/Finder: If a force restart doesn't work, you'll need a computer.
- Connect your iPad to a computer using a USB cable.
- Open iTunes (Windows/older macOS) or Finder (newer macOS).
- While connected, perform a force restart. Don't release the buttons until you see the recovery mode screen (an image of a computer and a cable) on your iPad, not just the Apple logo.
- On your computer, a dialog box will appear, offering the option to Update or Restore your iPad.
- Choose Update first. This attempts to reinstall iPadOS without erasing your data. If successful, your iPad will restart.
- If Update fails or doesn't resolve the issue, you'll need to choose Restore. WARNING: Restoring will erase all data on your iPad. Only do this if you have a recent backup. For more on backup strategies, consider exploring reliable iPad data backup methods.
iPad Frozen or Unresponsive After Update
Sometimes, an update seems to go smoothly, but then your iPad becomes unresponsive or lags heavily. This often indicates a software conflict or a corrupt update file.
Troubleshooting Steps:
- Force Restart: Again, this is your initial go-to.
- Check for App Compatibility: Immediately after an update, some older apps might not be fully compatible, causing crashes or slowdowns. Try updating all your apps via the App Store.
- Reset All Settings: Go to
Settings > General > Transfer or Reset iPad > Reset > Reset All Settings. This will reset all your settings (Wi-Fi passwords, wallpaper, etc.) but won't delete your data or apps. This can often clear up system-wide conflicts post-update. - Restore from Backup: If the problem persists, and you suspect the update corrupted something, you might need to restore your iPad from a backup made before the problematic update. Connect to iTunes/Finder, select your iPad, and choose "Restore Backup."
- Consider a Clean Restore: As a last resort, if restoring from backup doesn't help, you might need to perform a full restore as a new iPad. This ensures no old, corrupt data is carried over. (More on this later). For comprehensive insights into common iOS update issues, our dedicated guide provides further details.
Power Play: Charging & Battery Problems
Battery issues range from slow charging to rapid drain, and they can severely impact your iPad's usability. The iPad 7th Gen, like all devices, relies on healthy power components.
iPad Not Charging or Charging Slowly
You plug it in, but nothing happens, or the percentage barely creeps up. This is frustrating, but often involves external factors.
Troubleshooting Steps:
- Inspect Cable and Adapter: This is crucial. Damaged cables (frayed wires, bent pins) or faulty power adapters are incredibly common causes. Try a different Apple-certified cable and adapter, if available.
- Check Charging Port: Look into your iPad's Lightning port with a flashlight. Is there any lint, dust, or debris obstructing the connection? Use a non-metallic tool (like a wooden toothpick or a small brush) to gently clean it out. Be very careful not to damage the pins.
- Try a Different Outlet: Ensure the wall outlet is working. Test it with another device.
- Force Restart: Sometimes, the iPad's software can glitch and prevent proper charging. A force restart can clear this.
- Remove Case: Some bulky cases can interfere with the charging cable's connection to the port. Try charging with the case removed.
- Environment: Your iPad charges best between 32° to 95° F (0° to 35° C). Extreme temperatures can impact charging efficiency.
"Not Charging" Message or Rapid Battery Drain
If your iPad is plugged in but displays "Not Charging" (especially if connected to a computer's low-power USB port) or if the battery life suddenly plummets, here’s what to check.
Troubleshooting Steps for "Not Charging" Message:
- Use a Wall Adapter: Your iPad requires more power than most computer USB ports can provide. Always use the original Apple wall adapter (or a compatible higher-wattage one, e.g., 10W or 12W) plugged directly into a wall outlet for reliable charging.
- Check Adapter Wattage: Ensure your adapter provides sufficient power. The iPad 7th Gen typically comes with a 10W or 12W adapter. Lower wattage adapters might not charge it effectively, or at all.
Troubleshooting Steps for Rapid Battery Drain: - Identify Power-Hungry Apps: Go to
Settings > Battery. This section shows which apps have consumed the most battery power over the last 24 hours or 10 days. If an app you rarely use is high on the list, it might be running in the background excessively. - Adjust Background App Refresh: Turn off Background App Refresh for apps you don't need constantly updating. Go to
Settings > General > Background App Refresh. - Location Services: Apps using GPS can drain battery quickly. Review
Settings > Privacy > Location Servicesand set app access to "While Using the App" or "Never" where appropriate. - Push Mail/Fetch: If you have multiple email accounts set to "Push" or "Fetch" frequently, this can consume power. Adjust settings in
Settings > Mail > Accounts > Fetch New Data. - Reduce Screen Brightness & Auto-Lock: Lower your screen brightness and set "Auto-Lock" to a shorter duration (
Settings > Display & Brightness). - Disable Unused Connectivity: Turn off Wi-Fi or Bluetooth when you don't need them (from Control Center or
Settings). - Software Update: Ensure your iPadOS is up to date, as Apple often includes battery optimizations in new releases. For a deeper dive into optimizing your device's power, explore our guide on extending iPad battery life.
Connectivity Conundrums: Wi-Fi & Bluetooth Blues
Modern iPads are heavily reliant on robust connectivity. When Wi-Fi drops or Bluetooth devices refuse to pair, it can grind your productivity (or entertainment) to a halt.
Wi-Fi Not Connecting or Dropping
Your iPad might struggle to find networks, connect, or maintain a stable connection.
Troubleshooting Steps:
- Toggle Wi-Fi On/Off: Swipe down from the top-right to open Control Center, then tap the Wi-Fi icon to turn it off, wait 15 seconds, and tap it again to turn it back on.
- Forget Network and Rejoin: Go to
Settings > Wi-Fi, tap the "i" icon next to your network, then tap "Forget This Network." Re-enter your password to rejoin. - Restart Router/Modem: Power cycle your Wi-Fi router and modem (unplug for 30 seconds, then plug back in). This often resolves network-side issues.
- Reset Network Settings: Go to
Settings > General > Transfer or Reset iPad > Reset > Reset Network Settings. This will clear all saved Wi-Fi networks, passwords, cellular settings, and VPN configurations. You'll need to re-enter Wi-Fi passwords. - Disable VPN/Firewall: If you're using a VPN or third-party firewall app, try temporarily disabling it to see if it's interfering with the connection.
- Software Update: Ensure iPadOS is current. Sometimes, connectivity improvements are included in updates. For a full breakdown of network fixes, check out our guide on common iPad connectivity issues.
Bluetooth Devices Won't Pair
From AirPods to external keyboards, Bluetooth expands your iPad's capabilities. When it fails, it's usually a pairing issue.
Troubleshooting Steps:
- Toggle Bluetooth On/Off: From Control Center or
Settings > Bluetooth, turn Bluetooth off, wait a few seconds, then turn it back on. - Forget Device and Re-Pair: In
Settings > Bluetooth, tap the "i" icon next to the problematic device, then "Forget This Device." Put the Bluetooth accessory back into pairing mode and try connecting again. - Charge Bluetooth Device: Ensure your Bluetooth accessory has sufficient battery life.
- Distance and Interference: Make sure the iPad and Bluetooth device are close to each other. Avoid excessive interference from other wireless devices or physical obstructions.
- Restart Both Devices: Restart your iPad and power cycle the Bluetooth accessory.
- Check for Updates: Some Bluetooth devices have firmware updates that can improve connectivity.
Sound Off: Audio Problems
If your iPad 7th Gen is suddenly silent or sounds distorted, diagnosing the problem involves checking both software and hardware.
No Sound from Speakers or Headphones
You're trying to watch a video or listen to music, and all you get is silence.
Troubleshooting Steps:
- Check Volume Levels: Use the Volume Up button on the side of your iPad or the volume slider in Control Center to ensure the volume isn't muted or too low.
- Silent Mode Switch (if applicable): While the iPad 7th Gen primarily uses the side buttons for volume, ensure no accessibility features are accidentally muting sound.
- Test with Different Apps/Media: Play audio from multiple apps (e.g., Music, YouTube, Safari) to see if the issue is app-specific or system-wide.
- Disconnect Bluetooth/Headphones: Ensure your iPad isn't accidentally connected to a Bluetooth speaker, headphones, or a wired headset that might be redirecting audio. Turn off Bluetooth temporarily. Check the headphone jack for debris.
- Force Restart: A system glitch might be preventing audio output.
- Check for "Sound Check" or "EQ" settings: In
Settings > Music, ensure "Sound Check" is off and there's no custom EQ setting causing issues.
Muffled or Distorted Audio
If the sound is present but unclear, fuzzy, or crackling.
Troubleshooting Steps:
- Clean Speaker Grilles: Gently brush out any dust or debris from your iPad's speaker grilles. Use a soft, dry brush.
- Test with Headphones: Plug in a pair of wired headphones (if you have the adapter) or connect Bluetooth headphones. If the audio is clear through headphones, the issue is likely with the iPad's internal speakers.
- Remove Case: Some cases can obstruct the speakers, leading to muffled sound.
- Software Update: Ensure your iPadOS is updated, as audio driver issues can be resolved in updates.
- Restore Settings: If you recently changed audio settings or accessibility features, consider
Reset All Settings(Settings > General > Transfer or Reset iPad > Reset).
App Anomalies: Crashes & Performance Hiccups
Apps are the heart of your iPad experience. When they start crashing or the iPad becomes sluggish, it’s often a sign of resource strain or software conflicts.
Apps Crashing Frequently
An app repeatedly closing on its own is irritating and disruptive.
Troubleshooting Steps:
- Force Quit App: Swipe up from the bottom of the screen to reveal the App Switcher. Swipe up on the problematic app's card to force quit it. Then reopen the app.
- Update App: Go to the App Store, tap your profile icon, and scroll down to see if there are updates available for the crashing app or all apps. App developers frequently release updates to fix bugs and improve stability.
- Update iPadOS: Ensure your iPad is running the latest iPadOS version (
Settings > General > Software Update). System updates can resolve underlying issues affecting app performance. - Offload or Delete & Reinstall: If an app continues to crash, try offloading it (
Settings > General > iPad Storage). This frees up storage but keeps your app data. If that doesn't work, delete the app entirely and then reinstall it from the App Store. - Check Storage: If your iPad is nearly full, apps might struggle to run efficiently. Free up space (
Settings > General > iPad Storage).
Slow Performance or Lag
Your iPad used to be zippy, but now it feels like it's wading through treacle.
Troubleshooting Steps:
- Close Background Apps: Regularly clear out unused apps from the App Switcher. While iOS is good at managing memory, too many apps actively trying to refresh can slow things down.
- Free Up Storage: An iPad running low on storage (less than 10-15% free) will inevitably slow down. Delete unused apps, photos, videos, or files. You can find storage usage in
Settings > General > iPad Storage. - Clear Safari Cache: If web browsing is slow, clear Safari's cache and website data (
Settings > Safari > Clear History and Website Data). - Reduce Visual Effects: Go to
Settings > Accessibility > Motionand turn on "Reduce Motion" and "Reduce Transparency." These small visual tweaks can save processing power. - Reset All Settings: As mentioned earlier, this can clear out software conflicts without erasing your data.
- Software Update: New iPadOS versions often include performance optimizations.
When All Else Fails: Advanced Troubleshooting & Support Options
Sometimes, the standard fixes just aren't enough. When you've exhausted the common solutions, it's time to consider more drastic measures or seek professional help.
Erasing & Restoring Your iPad
Performing an "Erase All Content and Settings" operation, often followed by restoring from a backup, is a powerful troubleshooting step that can resolve deep-seated software issues.
Important Pre-requisite: ALWAYS BACK UP YOUR IPAD FIRST! Without a backup, you will lose all your photos, apps, documents, and settings. You can back up to iCloud (Settings > [Your Name] > iCloud > iCloud Backup) or to your computer via iTunes/Finder.
How to Erase:
- Go to
Settings > General > Transfer or Reset iPad > Erase All Content and Settings. - Follow the on-screen prompts. You'll need your passcode and Apple ID password.
After erasing, your iPad will restart as if it were brand new. You can then set it up and choose to restore from your most recent backup, or set it up as a new iPad if you suspect your backup might be corrupted.
DFU Mode: The Deepest Restore (Use with Caution!)
DFU (Device Firmware Update) mode is a special state that allows iTunes/Finder to restore your iPad to factory settings while reinstalling the latest firmware. It's different from recovery mode as it bypasses the current iOS and directly communicates with the device's bootloader. This is usually a last resort for severe software corruption, boot loops that recovery mode can't fix, or if your iPad won't enter recovery mode.
WARNING: DFU mode is complex and carries a small risk if not performed correctly. Only attempt this if absolutely necessary and after exhausting all other options.
How to Enter DFU Mode for iPad 7th Gen:
- Connect your iPad to a computer with iTunes/Finder.
- Ensure iTunes/Finder is open.
- Press and hold the Top button for 3 seconds.
- While still holding the Top button, press and hold both Volume Down and Volume Up buttons simultaneously for 10 seconds.
- Release the Top button, but continue holding the Volume Down and Volume Up buttons for another 5 seconds.
- Your iPad's screen should remain completely black. If you see the Apple logo or any other screen, you've held the buttons too long and need to start over.
- On your computer, iTunes/Finder should detect an iPad in recovery mode (even though it's technically DFU). You will then be prompted to "Restore" the iPad.
Use a DFU restore only when recovery mode restore fails and your iPad is severely bricked.
Contacting Apple Support
If you've tried everything and your iPad 7th Gen is still misbehaving, it's time to reach out to the experts. Apple Support has diagnostic tools and access to information that consumers don't.
How to Contact:
- Visit the official Apple Support website (support.apple.com)
- Use the Apple Support app on another device.
- Make an appointment at a nearby Apple Store or authorized service provider.
Be prepared to describe your problem in detail, including what troubleshooting steps you've already taken.
Considering Professional Repair
For hardware issues, particularly those not covered by warranty (like physical damage), an independent repair shop or Apple's official service center will be necessary. For example, if you suspect a faulty logic board, a persistent charging port issue that isn't debris-related, or a genuinely dead battery, professional help is key. Ensure any repair service uses genuine Apple parts if possible, especially for critical components like the screen or battery. You can always get a detailed overview of your Apple iPad 7th Gen to understand its specifications and potential repair complexities.
Proactive Care: Maintaining Your iPad 7th Gen's Health
An ounce of prevention is worth a pound of cure. By adopting a few good habits, you can minimize the chances of encountering serious issues with your iPad.
Regular Updates
Keep your iPadOS and all your apps updated. Software updates bring not only new features but also crucial security patches, bug fixes, and performance enhancements. Don't defer them indefinitely.
Storage Management
Don't let your iPad's storage get completely full. Aim to keep at least 10-15% of your storage free. This provides breathing room for the system to operate efficiently, process temporary files, and perform updates without issues. Regularly review Settings > General > iPad Storage to identify and offload/delete large, unused files or apps.
Protecting Your Hardware
- Use a Case and Screen Protector: Accidents happen. A good quality case and a tempered glass screen protector can save your iPad from many bumps, drops, and scratches.
- Avoid Extreme Temperatures: Don't leave your iPad in direct sunlight, a hot car, or extremely cold environments. Extreme temperatures can degrade battery health and damage internal components.
- Use Apple-Certified Accessories: Always use MFi (Made For iPad/iPhone) certified charging cables and power adapters. Off-brand or faulty accessories can cause charging problems, damage your battery, or even be a fire hazard.
- Clean Regularly: Gently clean your screen with a microfiber cloth and keep the charging port and speaker grilles free of dust and debris.
Your iPad 7th Gen: Getting Back to Smooth Sailing
Dealing with a misbehaving iPad can be incredibly frustrating, but most issues are solvable with a methodical approach. By starting with simple resets, systematically troubleshooting common problems like display, power, and connectivity, and knowing when to escalate to advanced options or professional support, you're well-equipped to handle nearly any challenge. Remember to back up your device regularly, stay updated, and practice good digital hygiene to keep your iPad 7th Gen running smoothly for years to come.